PART 3
Ink Bottle Tool:
Using the Ink Bottle tool, rather than selecting individual lines and objects, makes it easier to change the stroke attributes of multiple objects at one time.
To use the Ink Bottle tool:
- Select the Ink Bottle tool.
- Choose a stroke color as described in Using the Stroke and Fill controls in the toolbox.
Color Tools:
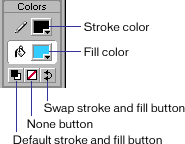
3. Choose line style and line width from the Stroke panel.
Stroke Panel:
Window > Panels > Stroke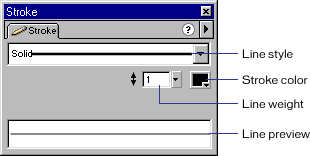
4. Click an object on the Stage to apply the stroke modifications.
Applying outlines to existing objects:
You can use the stroke tool to apply outlines even for things that were initially made without outlines.For example, if you initially created a rectangle with no outline, then later decided you wanted an outline, simply use the Ink Bottle tool as described above and a new outline will be applied.
Paint Bucket Tool
You can also use the Paint Bucket tool to adjust the size, direction, and center of gradient and bitmap fills.
To use the Paint Bucket tool to fill an area:
- Select the Paint Bucket tool.
- Choose a fill color from the color tool box.

3. Click the Gap Size modifier
- Don't Close Gaps : if you want to close gaps manually before filling the shape. Closing gaps manually can be faster for complex drawings.
- Choose one of the Close options to have Flash fill a shape that has gaps.
To adjust a gradient or bitmap fill with the Paint Bucket tool:
1. Select the Paint Bucket tool.
2. Click the Transform Fill
3. Click an area filled with a gradient or bitmap fill.
Depending on the type of object you're painting you will see different handles:
a. Transform Linear Gradient Fills
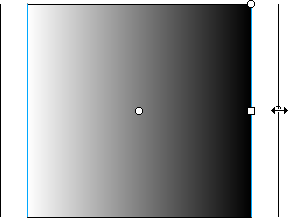 .
.b. Transform Radial Gradient Fills
 .
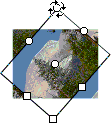
.c. Transform Bitmap Fills
 .
.4. Reshape the fill in any of the following ways:
a. To reposition the center point, drag the center point.

b. To change the width of the fill, drag the square handle on the side of the bounding box. (This option resizes only the fill, not the object containing the fill.)

c. To change the height of the fill, drag the square handle at the bottom of the bounding box.

d. To rotate the fill, drag the circular rotation handle at the corner. You can also drag the lowest handle on the bounding circle of a circular gradient or fill.
e. To scale a linear gradient, drag the square handle at the center of the bounding box.

f. To change the radius of a circular gradient, drag the middle circular handle on the bounding circle.

g. To skew or slant a fill within a shape, drag one of the circular handles on the top or right side of the bounding box.

h. To tile (repeat) a bitmap inside a shape, scale the fill.

Note: To see all of the handles when working with large fills or fills close to the edge of the Stage, choose View > Work Area.
The above, credit should goes to Techi Warehouse we recommend you to find out more over tutorial from there
No comments:
Post a Comment