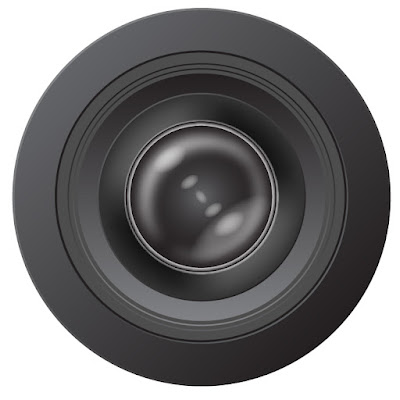
Look at above image even it was not a professional design but at least we can say it is good design as well. As what I mentioned in my previouse post. Before you design you might think and understanding the process fromt he beginning till end. In this tutorial you will learn in a easy way to make it like a real one. Sure it take time and many steps to do. But one thing is we only use Ellipse Tool to make it and some other effect.
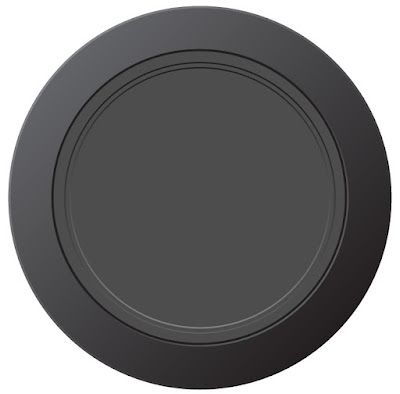
Step 1: use Ellipse Tool (L) make a circle size: 4cm x 4cm and fill Gradient with 100% black and 57.88% gray in an angle -45
Step 2: make other circle smaller then first one size: 3.98cm x 3.98 cm then fill gradient with 100% black and 74.99% gray and angle is -45. Please note that we are making a lens body so you will see below image how its bevel and emboss comes out.
Step 3: make 3rd circle size 3.12cm x 3.12cm in the angle is 135 and fill gradient in 100% black and 77.87% gray and now you got the cover of lens.
Step 4: make a solid black circle size: 3.1cm x 3.1cm and adjust it to the top left of the lens. Take note to red arrow once you adjust it a bit you will have a white shine.
Step 5:make 5th circle size: 3cm x 3cm fill in solid gray of 70% and adjust it middle of lens. Alright now we have a black shadow. Look to below image.
Step 6: make 6th circle size 2.85cm x 2.85cm in same way fill in gradient in 100% black but location is 85.45% and 77.87% gray with angle 90.
Step 7:make 7th circle size: 2.82cm x 2.82cm fill in solid gray color 70%.
Step 8: make 8th circle size: 2.74cm x 2.74cm fill in gradient in 100% black and 60% gray angle 90.
Step 9: in 9th circle we make it smaller in size 2.71cm x 2.71cm and fill a solid gray 70%
Step 10: we continuous to the 10th circle. Again make a circle size 2.63cm x 2.63cm and fill gradient in 100% black and 60% gray in angle of 90.
Step 11: make the 11th circle in size 2.22cm x 2.22cm revert the angle to -45 fill gradient 100% and 80% gray. See what the different in below image.
Step 12: this time we create a gradient mesh. This part is some thing new in this tutorial and very importance in your future design. As my previous design of Illustrator Tutorial: vector background you will learn in basic Gradient Mesh using Mesh Tool.
Let's make12th circle size 2.19cm x 2.19cm and fill only solid black and go to Object menu => Create Gradient Mesh... in the option box make some change here Rows: 3, Columns: 3, Appearance: Flat and Highlight: 100. t won't appear like image yet. Press U for the Mesh Tool. Let's give a gray color in the top left part. Once you press U then make a select on an anchor point on the left side where the junker line is.
See the red arrow it shows you where the junker anchor points are JUST USE YOUR MOUSE TO CLICK ON THAT THEN YOU CAN COLOR IT STRAIGHT AWAY. Please color it as seen in below.
Step 13: make 13th circle and fill in white size 1.65cm x 1.65cm this object we apply feature.. and go to Effect menu ==> Stylize ==> feature.. and apply 0.05cm
Step 14:make 14th circle size 1.61cm x 1.61cm and gradient type is Radial which make the gray color in middle as 82.79% and round black 100%
Step 15: we make 15th circle size 1.57cm x 1.57cm and feature it again in same option as before.
Step 16: this is the 16th circle sure is smaller in size 1.51cm x 1.51cm fill gradient as below option
Gradient type: Radial, Location: 28.48% , 100% black and 74% gray.
Step 17: we make a feature around the above object. Just your pen tool to draw it or you can make two circle and use your pathfinder to cut. Then go to Effect menu ==> Stylize==> Feature... choose 0.08cm
Tips: to make it more blur you also can do some blur tool there.
Step 18:try the same way of feature and make some small and big object as seen in the image.
Step 19:let's make a 30 transparency lens above all object. To do so you have to make last circle and fill in white color only. Then duplicate it and move down until you think it is possible and cut it with pathfinder then you can give it as 30% of transparency. After that give it in a black background.
Step 20: in this black background let's make a reflection of the lens just only make a copy of lens and move down and in the transparency box make an opacity mask and press M to make a object over it. In the gradient box fill in 100% black and 60% gray and adjust as type: linear, angle: 90, location: 30.77%
This is the final step. Add in text on the lens
After all I am trying to reduce some unused words to make you more clear and understand the real action while doing the design. If you found out some miss step please kindly let me know. I hope you all will enjoy this post and see the share button below. I share this to you and you might share it to your friends. I will mind if you I know you won't share your friends.
Your comment is much appriciated to me. Your previouse comment make me grove. So say somethings her now... THANK YOU VERY MUCH.


Great design!
ReplyDeletenice post brother keep post more...
ReplyDeletelove it and do enjoy more
ReplyDeleteits great, i try follow the instructions and i can do that
ReplyDeleteits very easy for me now
love it share to your friends. I try to make every easy understanding. Cheer.....
ReplyDeletethis is a very nice and easy navigation blog
ReplyDeleteThank you very much let's see other reader idea....
ReplyDeletenice tutorial........
ReplyDeleteCould you tell me what is it adobe illustrator?
ReplyDeleteMy friend Rona, Adobe Illustrator is part of a Adobe Creative Suit which you can use it for general design.
ReplyDeleteits very nice gud keep it up
ReplyDelete